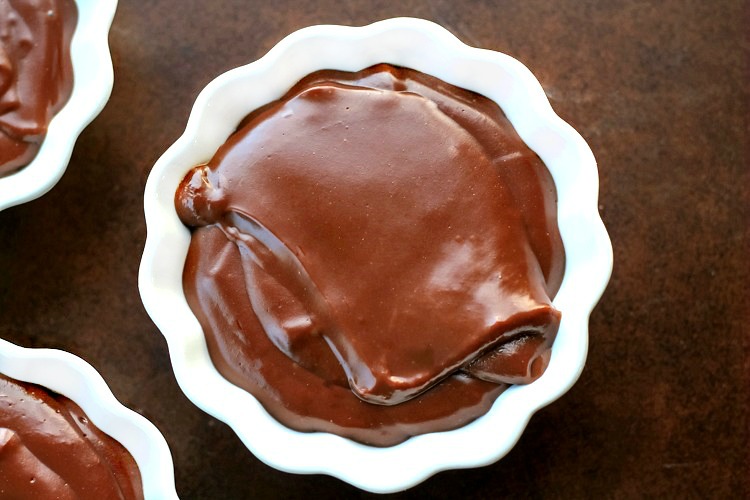
Homemade Chocolate Pudding Recipe
Baking from scratch and making homemade desserts has always been a love of mine. When I started this blog I hoped that I could share that love with you and show you how easy and economical it is. Homemade chocolate pudding is one of the best examples of that.
Not to mention better for you as well. Not better for you as in “stuff yourself with homemade cakes and puddings because it’s homemade” better for you. (Even though you may want to after trying this chocolate pudding.)
It’s better for you in that you’ll know what’s in it. There won’t be any ingredients that you can’t pronounce in this homemade chocolate pudding recipe.
Baking or making homemade desserts from scratch isn’t hard, it’s just a matter of taking things one step at a time. Always read through the recipe at least once all the way through before you start and mentally imagine the steps in your head. This will save you a lot of time, effort, and frustration in the long run.
Have your ingredients measured out ahead of time to save yourself some confusion while mixing the recipe. I’ve decided to do more tutorials this year to help beginner bakers become acquainted with baking from scratch and making homemade desserts.
Veteran bakers, any words of wisdom on a tutorial recipe to help beginner bakers would be much appreciated. Leave your tips and words of encouragement in the comment section.
Let’s get started with the first tutorial recipe of the year. All you have to do is make homemade chocolate pudding once to get the feel of it. After that, chocolate pudding is a breeze!
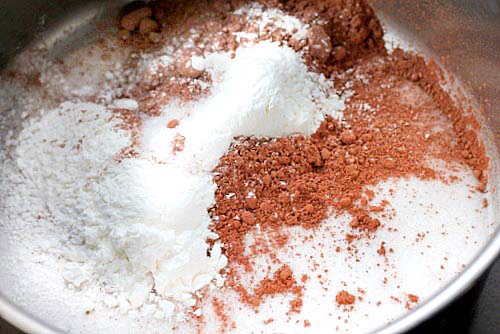
First, read the ingredients and instructions and get acquainted with the chocolate pudding recipe. Measure out all your ingredients. Place the sugar, cornstarch, cocoa powder, and salt in a heavy-duty saucepan.
Whisk the ingredients together. Take the butter and vanilla and place it near the stove so it’s measured out and ready when you need it.

After whisking the ingredients together you may see clumps in the mixture, they are cocoa clumps. Take the back of a kitchen tablespoon and press the large clumps out.
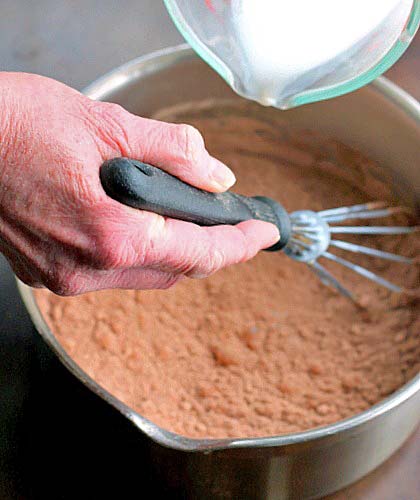
With a whisk in one hand, slowly pour the milk into the pan while whisking.
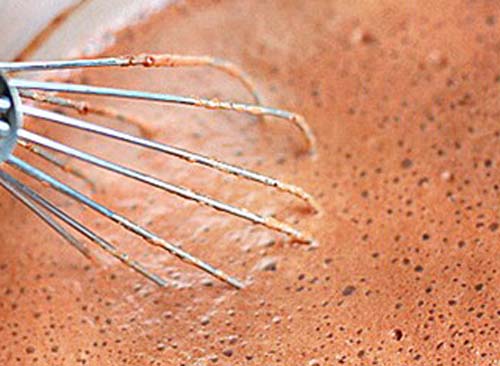
Place the pan on a burner turned to low to medium heat and whisk the mixture slowly. Why low to medium heat ? Your chocolate pudding has to thicken SLOWLY. This is where you need a little patience. I have a gas stove that doesn’t have markings on the knobs for low, medium or high heat like an electric stove would. I start the chocolate pudding out on low heat and if need be turn the flame up a little more to medium when I make this.
It’s going to take about 10 minutes for the chocolate pudding to start to thicken and come up to a boil while you whisk. Turning the heat up to speed the process won’t help.
You may run the risk of burning it or it may boil quickly but the pudding will not have thickened. What you’ll be left with is hot chocolate soup.
If the pudding hasn’t thickened and come up to a boil in the saucepan, it won’t set up in the refrigerator either. I can’t tell you how many times I’ve read comments on recipes where someone said…”It came to a boil but never set up in the refrigerator”.
Why would that happen? The heat was up to high, the mixture boiled , before it thickened. It will always thicken first, then boil. Patience Grasshopper, it’s a virtue.
When the pudding does thicken, it will happen fast and all at once. With in seconds it will start to boil. Large bubbles will come to the surface and erupt like little volcanoes. Whisk for one more minute.
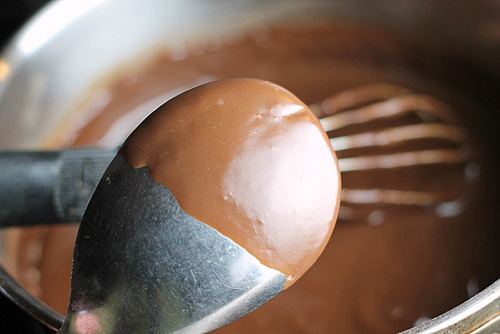
Your chocolate pudding should be thick enough to coat the back of a spoon without seeing the metal on the spoon through the pudding.
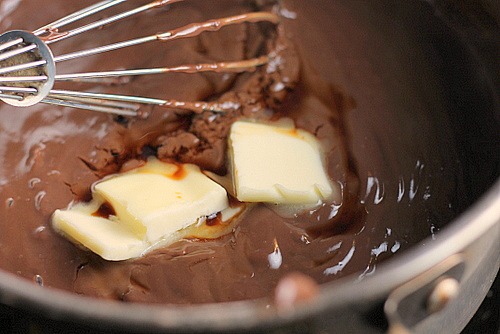
Take the pudding off the burner and add the butter and vanilla , whisk to incorporate it into the pudding.
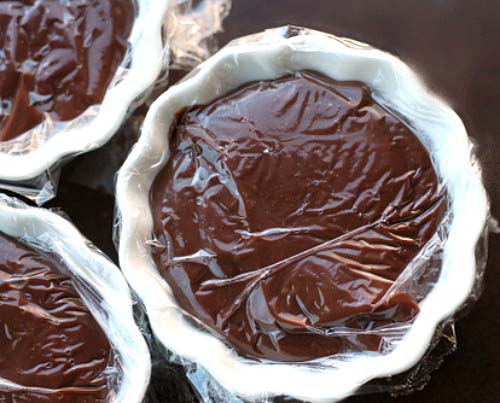
Pour the pudding into individual dessert cups, a graham cracker crust or a pie crust, depending on how you want to serve it. Press plastic wrap onto the pudding surface so it actually touches the surface of the pudding. This prevents a “skin” from forming on the top of the pudding when it cools. Refrigerate for about 2 hours until cooled. Top with whipping cream if desired and serve.
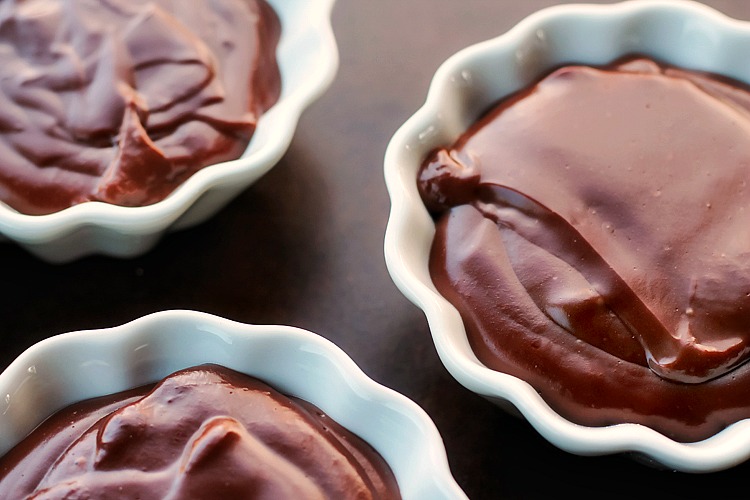
Congratulations, you just made a delicious Homemade Chocolate Pudding! Enjoy!
Homemade Chocolate Pudding
Ingredients
- 2/3 cup sugar
- 1/4 cup cocoa
- 3 tablespoons cornstarch
- 1/4 teaspoon salt
- 2-1/4 cups milk
- 2 tablespoons butter
- 1 teaspoon vanilla extract
- Whipped topping as a topping optional
Instructions
- 1. First, read the ingredients and instructions and get acquainted with the recipe. Measure out all your ingredients. Place the sugar, cornstarch,cocoa powder and salt in a heavy duty saucepan . Whisk the ingredients together. Take the butter and vanilla and place it near the stove so it's measured out and ready when you need it.
- 2. After whisking the ingredients together you may see clumps in the mixture, they are cocoa clumps. Take the back of a kitchen tablespoon and press the large clumps out.
- 3. With a whisk in one had, slowly pour the milk into the pan while whisking.
- 4. Place the pan on a burner turned to low heat and whisk the mixture slowly. Why low heat? Your pudding has to thicken SLOWLY. This is where you need a little patience. It's going to take about 10 minutes on low heat for the pudding to start to thicken and come up to a boil while you whisk. Turning the heat up to speed the process won't help. You may run the risk of burning it or it may boil quickly but the pudding will not have thickened. What you'll be left with is hot chocolate soup. If the pudding hasn't thickened and come up to a boil in the saucepan, it won't set up in the refrigerator either. I can't tell you how many times I've read comments on recipes where someone said..."It came to a boil but never set up in the refrigerator". Why would that happen? The heat was up to high, the mixture boiled , before it thickened. It will always thicken first, then boil. Patience Grasshopper, it's a virtue.
- 5. When the pudding does thicken, it will happen fast and all at once. With in seconds it will start to boil. Large bubbles will come to the surface and erupt like little volcanoes. Whisk for one more minute.
- 6. Your pudding should be thick enough to coat the back of a spoon without seeing the metal on the spoon through the pudding. Take the pudding off the burner and add the butter and vanilla , whisk to incorporated it into the pudding. Pour the pudding into 4 dessert cups, a graham cracker crust or a pie crust depending on how you want to serve it. Press plastic wrap onto the pudding surface so it actually touches the surface of the pudding. This prevents a "skin" from forming on the top of the pudding when it cools. Refrigerate for about 2 hours until cooled. Top with whipping cream if desired and serve.
Video



Looks delicious. I wish you would put the nutritional information. Like the calories and sugar in grams and sat. fat in grams and Protein. I have started Weight Watches and I can eat different things but should know what the calories, sat. fat, sugar and protein are. Then I can figure out the points for it and what to allow.
Even the calories would help.
I use to have a program that did that Betty but found out it wasn’t allowing people to print the recipe. I had to get rid of it.
If you are using a program like Fitness Pal or some other equivalent, if you type the recipe in, it will figure it for you.
Oh nice Cathi, thanks for sharing that.
Struggled so hard with this. Set my burner on a lower setting and sat there stirring for almost 25 mins before it would boil and it never thickened. By the time I gave up my baby was up and me time was over.
Ashley I’m so sorry it didn’t work for you. Did it thicken at all during the cooking process?
I’m having a hard time with this. The heat is set to low, i’ve been whisking for almost 30 minutes and it still hasn’t thickened. What should I do?
Raelyn turn the heat up to medium and whisk till it thickens.
Do you have a guess as to how many ounces this recipe makes?
It will fill one pie or make four pudding dishes. It makes 2 1/4 cups of filling, same amount as the milk you use.
Thank you Cathi!
Hi, I found this pudding recipe on Pinterest and was blown away at how simple and quick it is. No more boxed pudding for us. I did make one change; our son has EOE (his esophagus is allergic to just about everything) and dairy is one of the things he can’t have. So I substituted the milk with coconut milk at the same quantity and it is amazing. When all our kids come over they want me to cook them pudding for a treat so I double it, which seems to take about 2 more minutes on the cook time. Thank you so much for posting this. Love it@
Thank you Robert for coming back to tell me you made it. How wonderful you were able to adjust it to your son’s needs! I love comments like this because it will help other people who may have the same dietary needs to know you did it and it works! Thank you Robert!
*****
I’ve never made pudding before
I made this a few hours ago and let it setup and chill in the frig.
Wow! Is this ever good! I followed your directions exactly. I had it over low heat and it did take a while to come together and thicken. Your description of how it starts to thicken – “When the pudding does thicken, it will happen fast and all at once. With in seconds it will start to boil. Large bubbles will come to the surface and erupt like little volcanoes.” was exactly how it came together.
I tasted it while it was still warm and I thought it needed more sweetness but I was wrong. Once it chilled in the frig, it was perfect!
Fantastic Bobi!! You have no idea how happy it makes me you made home made pudding and loved it! There’s a lot of satisfaction in knowing you can make something from scratch. Thank you for coming back to tell me!!
Do you think I could double the recipe?
You could double it bobi, it’s gonna take double the time to slowly bring it to boil. You’ll have to be very patient so as not to waste all those ingredients though. Maybe just make two separate batches?
Thank you bunny! I think two batches would be better.
I think so sweetie, I would feel terrible if you wasted ingredients. Let me know how it goes for you.
Its been 20 minutes and still no boil.
Just seeing this Kathy, let me know how it goes.
Looks great! So excited to try this, thank you!!
Your welcome Ann!
Am I the only one hysterical from the “patience grasshopper” quote?
LOL!! You got it, I’m so happy!!! You’re the first one to notice and comment about it!!!
Found this recipe on Pinterest, I had extra milk to use up and was finding something to use it up. It took me a while to get it to boil, I was cautious about upping the heat but eventually got there. And I’m happy I didn’t give up, this was amazing!! We didn’t even let it cool all the way before we dove in. Thank you for a great recipe and excellent detail!
I’m so happy you tried it and loved it Kristina, thank you so much for coming back to tell me, it always makes my day!
I left it on low the entire time, 25 minutes, and it still hasn’t thickened. I don’t know what to do. I followed your instructions to the T.
Melissa did it boil at all?
No, it never did boil. I did finally turn it just a bit up after 25 minutes, but it still never boiled even after another 10 minutes.
This is so good! Instead of butter I like to add peanut butter and eat hot!
Wow Ashlee fantastic adaption I love it! Thanks for coming back to tell me!
This recipe is identical to the one on Hershey’s site……
Emily, I’ve got a whole lot of hand written recipes from 30 plus years of cooking and baking. It doesn’t come as a surprise to me that it would be a Hershey’s recipe, I love their cocoa and use it all the time. Thanks for pointing it out.
Made your recipe today, my wife and myself loved it. Took some time to boil so turned up to med. to thicken, turned out fine. Can I cut sugar down a bit as was a little to sweet
Terri I think you could and it wouldn’t hurt. Let me know if you do it, t’ll be helpful to other people who might want to do the same thing. Thanks for coming back to comment!
My daughter and I made this. It is fabulous! Thank you for a wonderful recipe.
Your welcome Amber!! Thank you for coming back to tell me, made my day!
I never do this but these instructions need to be amended.
Low on your stove may work and work for others but doesn’t for everyone – there should be some sort of note about that.
Patience… honey I have been trying to make this recipe for an hour. I had to slowly up the heat to MED because I was stirring hot chocolate soup for 30+ minutes, only then did it thicken. I had to wait some more for it to boil. Now I have to wait 2hrs to eat it… not impressed. Should have bought pudding in a box. Also instead of saying “set aside butter and vanilla until you need it” .. “butter and vanilla are added at this step”.
Anonymous, my stove is a gas stove. Low heat works for me. I wrote cook under low heat because, yes every stove is different. I would rather you make it the first time under low heat, figure out what works best for your stove and adjust it the next time you make it. It’s that simple. I’m not into having people waste ingredients by having the heat turned up and risking burning the pudding. It’s a homemade recipe for pudding, it really does sound like the next time you want chocolate pudding, just stop at the store and buy it.
Hi Bunny! Thank you for this recipe, I just made it for my family tonight, I tried it while still hot and so good and comforting. I will say that I was standing at the stove for an hour thinking when was it going to thicken so I turned it up to medium and that did the trick! I have an electric/coil top stove so medium worked for me. All in all a really good recipe! I’m sure my family will be so happy! Thank you!
Thank you Nicolette. My stove is gas and there’s no markings on the dial to say whether it’s at low, medium or high heat. I’m happy medium heat worked for you!
I made this with a high quality chocolate milk and special dark cocoa powder. Just oh my goodness!!!
Wow Cathy! What a way to kick it up! Fantastic!
I used the Hersey Cocoa Natural Unsweetened and cold milk to start out with. First, did I used the wrong cocoa, if so what kind should I buy? Secondly, should the milk be room temperature before you start making the pudding. Finally is there such a thing as to low for heat setting. My pudding did not thicken up in 10 minutes nor 20 minutes and I whisk the entire time. Please help.
Kimberly you used the right cocoa. Yes you used the right milk and no it doesn’t have to be room temperature. I have a gas stove, there aren’t any low, medium or high settings on the knobs like an electric stove would have. Medium to low is a good starting point for the pudding on my stove You might want to try that for yours. The important thing about the cooking of the pudding is to make sure that it thickens first then comes to a boil. If that takes upping the temperature to medium then do it.
Thank you
I made this recipe as part of a layered dessert (chocolate cake, graham cracker crumble, chocolate, this pudding recipe & marshmellows – each component made from scratch – & healthy) for a dear friend’s 75th birthday lunch date. While each part was delicious & could basically stand alone as a very fulfilling treat, together they were magical.
About Bunny’s post:
I love step 1 instructions. So true for any recipe. Understand your recipe, prepare ingredients ahead, totally stress free event.
I had a bit of a long stir as well, but I didn’t mind. I stirred with love, trusting Bunny’s suggestion to “have patience” in step 4. She gives ample explanation as to why so we know that going in & boy is it worth it! Homemade pudding is the best.
I did omit the butter – dietary issue – & it was still rediculously creamy & delicious. Otherwise I followed directions to the letter and everything turned out just as Bunny says. Definitely, make this.
Judy I love this so much, thank you. I absolutely love what I do and people like you make it so worthwhile to me. Thank you so much.